![pax2pay-dark-symbol 300dpi.png]](https://support.pax2pay.com/hs-fs/hubfs/pax2pay-dark-symbol%20300dpi.png?height=50&name=pax2pay-dark-symbol%20300dpi.png)
What are Batch Payments?
The batch payment feature allows you to upload multiple payments at once, streamlining the payment process, saving time, and reducing errors.
Key capabilities include:
- Bulk Virtual Cards: Generate numerous virtual cards at once to pay multiple suppliers.
- Data Integration: Include full booking information or custom metadata for every card created.
- Hybrid Uploads: Create batches that include both bank transfers and virtual cards within the same file.
- Ready-to-use Templates: If you are a first-time user, you can download a pre-formatted template to ensure your data is structured correctly.
Benefits of using Batch Payments
- Validation Response: Receive a validation response upon uploading the batch file, allowing you time to review before final confirmation.
- Seamless Integration: Once executed, the payments appear in the portal in the same way as individual transactions. Reconciliation is fully supported and extractable from the Accounts Room.
- Time Savings: Efficiently handle a large volume of payments to multiple suppliers simultaneously
- Reduced Risk: Minimise manual entry and the potential for errors
- Enhanced Cards Controls: Options to select card usage, either Single-use or Multi-use cards. You also have the option to select a Card Close Date, which must fall within the pre-agreed card expiry date.
- Batch Summary: After submitting the batch payment CSV template, you can view a detailed overview including pre-upload checks, real-time status updates, and download confirmations.
How to upload a Batch Payment CSV File
- Navigate to Payments: Log into the portal, select the "Batch Payments" section, followed by “+Batch”.

- Download Template (Optional): Generate an example file by selecting a “default”, “hotel” or “invoice”, which will provide a CSV file with the required headers.
- Prepare Your File: Fill in your payment details, including supplier info, amounts, and any necessary metadata.
- Upload & Review: Return to the Batch Payment page by clicking “Back to Payments” and then “Batch”. Upload your completed CSV file. The portal will validate the data and alert you to any errors before processing.
- Confirm: Once validated, select “Process” to authorise the batch and to create all payments.
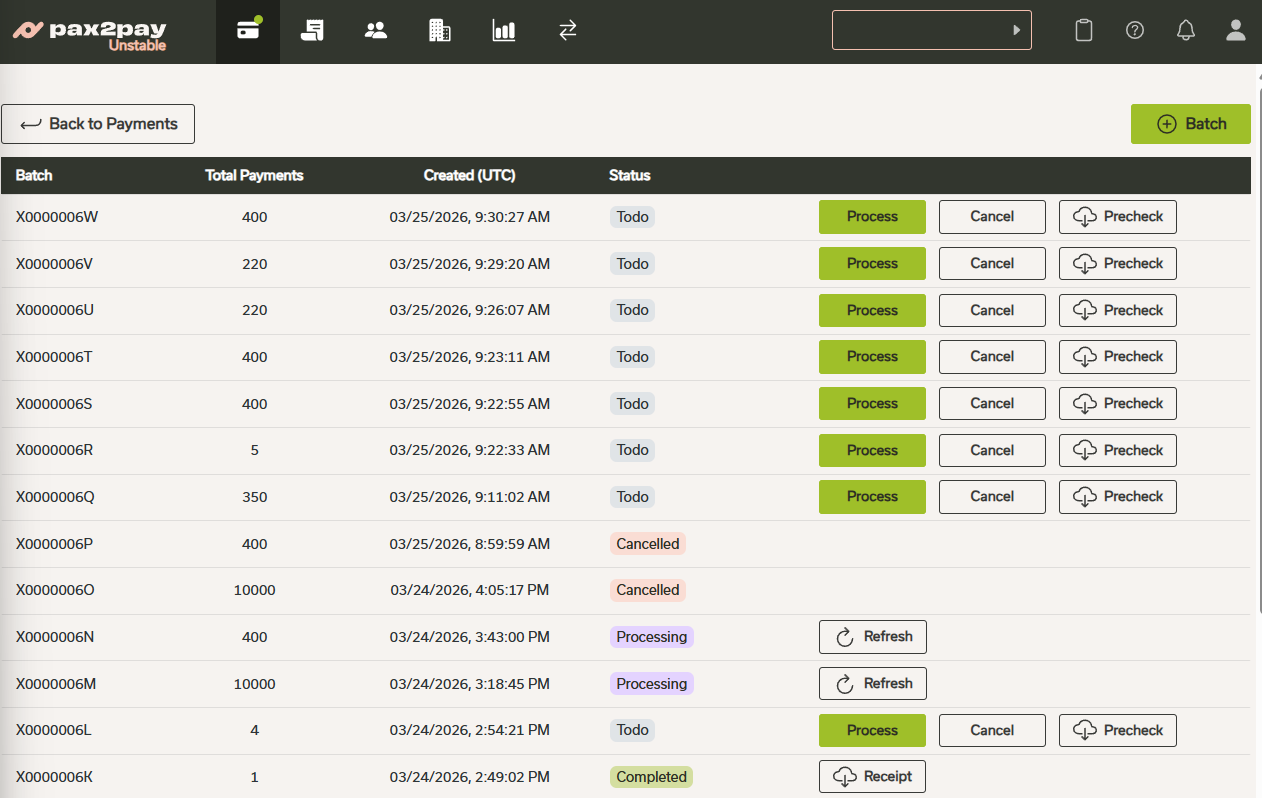
Batch Summary
Once uploaded, the batch upload will appear in a table overview, where you can:
- Control the batch for later processing (Status: Todo)
- Performs a pre-uploaded check (Status: Todo)
- Refresh the status of a batch (Status: Processing)
- Download receipts once processing is complete (Status Complete).
If you have any further questions about batch payments, please reach a ticket with our customer support team here.